Connect your AI directly
The best way to build with AI: plug the GDN toolkit into your assistant so it doesn't just write code — it scaffolds the app, renders the panel and looks at the result, fixes what it sees, validates, and generates the catalog previews. You describe the app; the AI runs the whole loop.
This works through MCP (Model Context Protocol), a standard for giving AI assistants tools. It's not Claude-only: Claude Code, Claude Desktop, OpenAI's Codex CLI, Cursor, and most modern AI tools speak it. (ChatGPT itself is the exception — see below.)
Every render below is a real panel output from a real session — this exact app was built this way, start to finish.
Setup
- Claude Code
- Claude Desktop
- Codex CLI
- ChatGPT & others
Zero setup. The repo ships a .mcp.json, so the tools register themselves:
git clone https://github.com/glance-led-dev/glance-dev-network.git
cd glance-dev-network
pip install -e .
claude
Open Claude Code inside the repo folder and approve the glance MCP server
when prompted. That's it — ask for an app.
Add the server to your claude_desktop_config.json
(Settings → Developer → Edit Config):
{
  "mcpServers": {
    "glance": {
      "command": "gdn",
      "args": ["mcp"]
    }
  }
}
Restart Claude Desktop; the glance tools appear in the tools menu.
If gdn isn't on your PATH, use "command": "python",
"args": ["-m", "gdn", "mcp"] instead.
OpenAI's terminal agent launches local MCP servers, so you get the same loop as Claude Code — it renders, looks at the panel, and fixes what it sees. One command registers the tools:
git clone https://github.com/glance-led-dev/glance-dev-network.git
cd glance-dev-network
pip install -e .
codex mcp add glance -- gdn mcp
codex mcp list should now show glance. Start Codex in the repo folder and
ask for an app:
codex
Prefer editing a file? That command writes this to ~/.codex/config.toml, and
you can add it by hand instead:
[mcp_servers.glance]
command = "gdn"
args = ["mcp"]
The whole loop depends on the AI seeing its renders, and older Codex builds
displayed <image content> for images returned by MCP tools without passing
them to the model
(openai/codex#4819, since
fixed). If it can't seem to see its own panel, update Codex first.
Any client that can launch a local command works — the server speaks plain MCP over stdio. Point it at:
gdn mcp
(or python -m gdn mcp if gdn isn't on your PATH). In Cursor, add it
under Settings → MCP.
ChatGPT only talks to MCP servers it can reach over the public internet by
HTTPS. It never launches a command on your machine, so there's no way to hand
it gdn mcp — the Developer mode connector form asks for a URL, not a command.
You could wrap the server in an HTTP bridge and tunnel it out, but don't: these tools write files and run code on your computer, and the server has no authentication, so anyone who found the URL would get both.
With ChatGPT, use the copy-paste prompt instead — you paste the two files into a folder yourself, and Studio gives you the live preview. For the connected loop inside OpenAI's tooling, see the Codex CLI tab.
What the AI gets
| Tool | What it does |
|---|---|
create_app | Scaffold a working app folder (manifest + code) |
render_app | Render a page and return the panel as an image — with simulate_offline to see the no-data screen |
validate_app | The publish-time check, plus a no-network render to prove the fallback works |
write_previews | Generate the preview/ catalog images, same as Studio and gdn submit |
measure_text | Pixel width of a string in a font — no more clipped text |
list_fonts / list_colors | The real font and color tables, so nothing is guessed |
The renders it gets back aren't descriptions — they're images. The AI sees the panel, which is what makes the loop work.
Rendering and measuring don't change anything on disk, and the server says so, so most clients stop asking you to approve every single render once you've allowed the first.
It already knows the rules
Tools are only half of it. GDN has rules an assistant can't guess and that fail
silently when broken — the panel is 32px tall, fonts are uppercase-only,
http.get returns a dict you read with resp["status_code"] rather than a dot.
So the server hands those over too, the moment it connects:
| What it gets | When |
|---|---|
| The rules that fail silently | Automatically, on connect |
| The full drawing API, the helper list, and the manifest schema | Pulled in when it starts writing code (glance://reference/authoring) |
| The design guidelines — safe zones, font roles, color, pixel art, the four screens | Pulled in before it lays out a page (glance://reference/design) |
| A complete working app to copy from | The same files create_app scaffolds |
It designs with you, not for you
The server's instructions tell the assistant to ask how you want the app to look before it writes any code — a drawing, a sketch, or a zone-by-zone description: what's the hero, what pixel art, which colors, which widths. It mocks up your layout with placeholder content, renders it, and iterates until you approve the look; only then does it wire up the data.
The design guidelines it follows are defaults you can override case by case. What they're there to prevent is every AI-built app looking like the same template filled in twice — an app should come out looking great and materially different from every other app in the catalog. If your content genuinely won't fit the rules, a well-behaved assistant says so and gives you the trade-offs instead of shipping a forced compromise.
In a coding agent like Claude Code or Codex CLI this is belt and braces — the repo is on disk, so the assistant could read the source anyway. In Claude Desktop there's no filesystem, so this is the only way it learns GDN. Which is the real reason the paste-in prompt exists: it's for chats without MCP. Connected here, you don't need it.
If your client shows prompts as slash commands, you'll also see
build_an_app — pick it, describe your app in a sentence, and everything
above is already loaded, design guidelines included: the first thing it does is
ask for your layout.
The glance tools scaffold, render, validate, and generate previews — they don't
read or write your source files, because coding agents like Claude Code, Codex
CLI, and Cursor already have that built in. In Claude Desktop, pair this with a
filesystem MCP server so the assistant can save app.star after it writes it.
A real session, start to finish
One prompt, and the loop runs. This is the actual session that produced Rain Radar (condensed; every render is genuine):
Build me an app: average rainfall in a 100-mile radius of a ZIP code over the last 60 days, one page, draw a cool graph.
create_app{"path": "apps/rain-radar"}Created apps/rain-radar with manifest.yaml and app.star (a working example).
measure_text{"text": "RAIN 100MI 60D", "font": "4x7"}'RAIN 100MI 60D' in 4x7: 65px wide, 8px tall. Fits panel width 128px: yes.
I'll fetch the ZIP's coordinates, then one Open-Meteo call sampling five points across the radius, and draw the 60 days as a sparkline. Writing manifest.yaml and app.star now, then rendering to check.
render_app{"app_dir": "apps/rain-radar"}Page 1/1 (rain) — 128x32 panel.
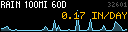 image returned to the AI
It works — real data on the first render. But looking at it: the fill under the line is barely visible and the graph floats with no baseline. Fixing both and rendering again.
render_app{"app_dir": "apps/rain-radar"}Page 1/1 (rain) — 128x32 panel.
image returned to the AINice. Make the radius a setting people can change.
render_app{"app_dir": "apps/rain-radar", "inputs": {"zip": "98101", "radius": "50"}}Page 1/1 (rain) — radius input wired up; Seattle at 50 miles.
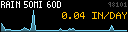 image returned to the AI
validate_app{"app_dir": "apps/rain-radar"}PASS — 1 page renders cleanly.
write_previews{"app_dir": "apps/rain-radar"}Wrote preview/ images: preview.png, rain.png
Done — validated, with catalog previews generated. Ready to submit whenever you are.
The AI checks the failure screens too
A panel on a wall has to show something sensible when a ZIP doesn't exist,
an API is down, or the data comes back empty. render_app takes a
simulate_offline flag that makes every http.get fail, so the AI can look
at the fallback screen the same way it looks at the happy path — and
validate_app warns if an app crashes with no network instead of falling
back. These two renders are the real fallback screens it checked:
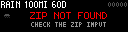
00000 → a designed answer, not a crash.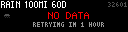
simulate_offline: true → the API-down screen.Keep Studio open while you talk
The workflow that feels magic: Studio on one side, your AI chat on the other. The MCP tools edit the same files Studio watches, so every change the AI saves re-renders in Studio instantly — you watch the panel evolve in real time, tweak an input, and tell the AI what to change next. For an app wider than 64, Studio's Preview your app in action card plays it in the scroll sequence between two neighbor apps on every panel size — the way it will actually be seen, and the only honest check for the #1 scroll rule.
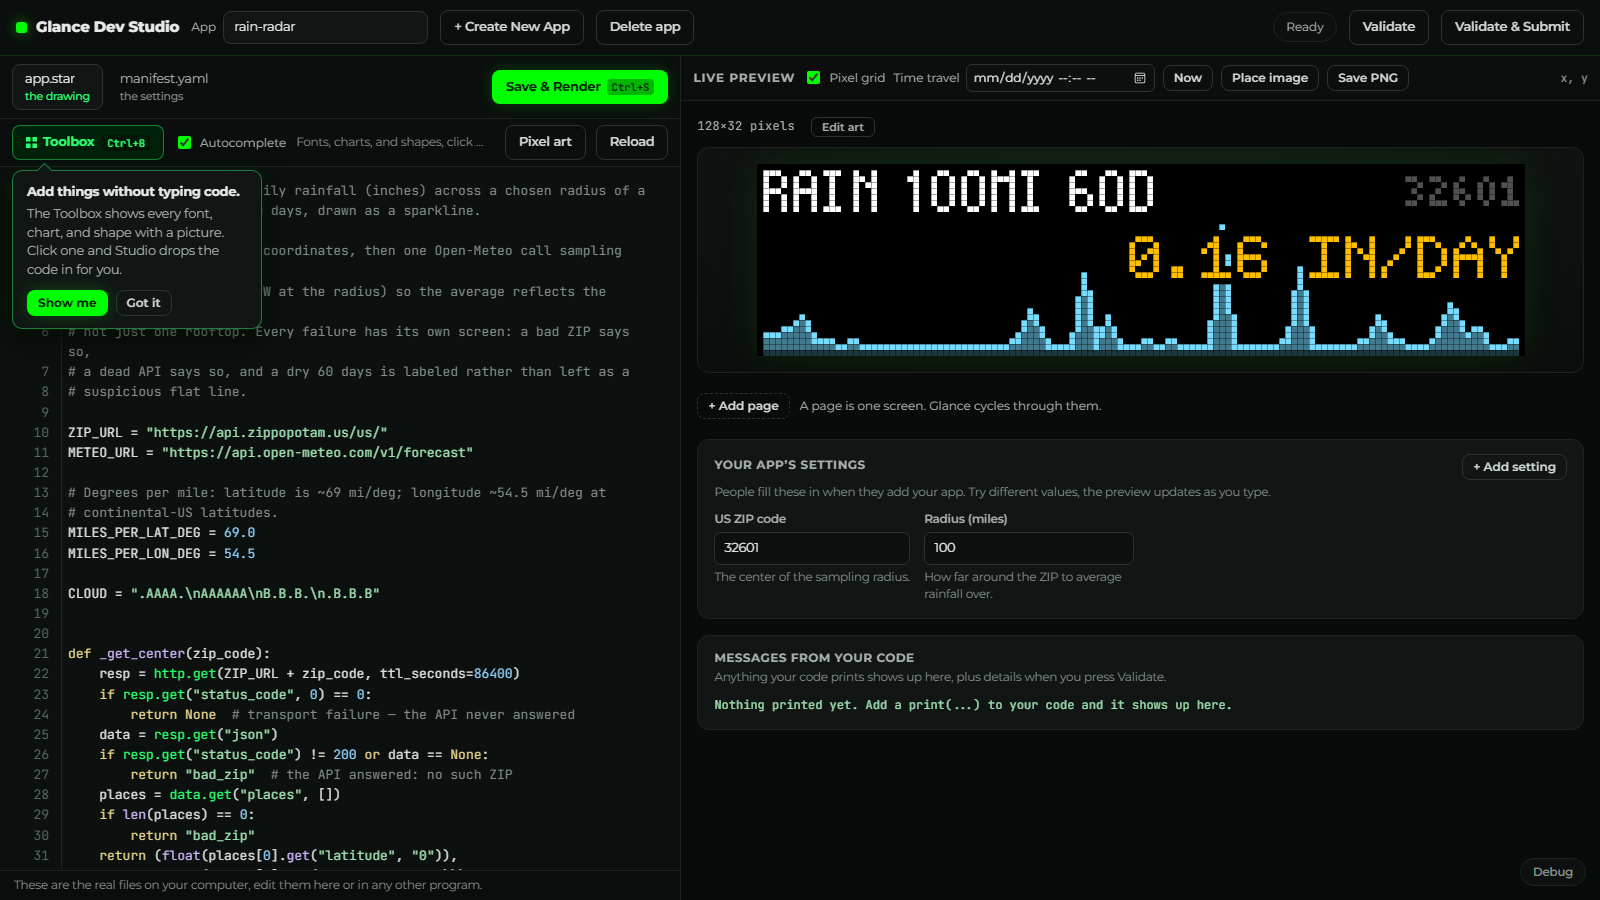
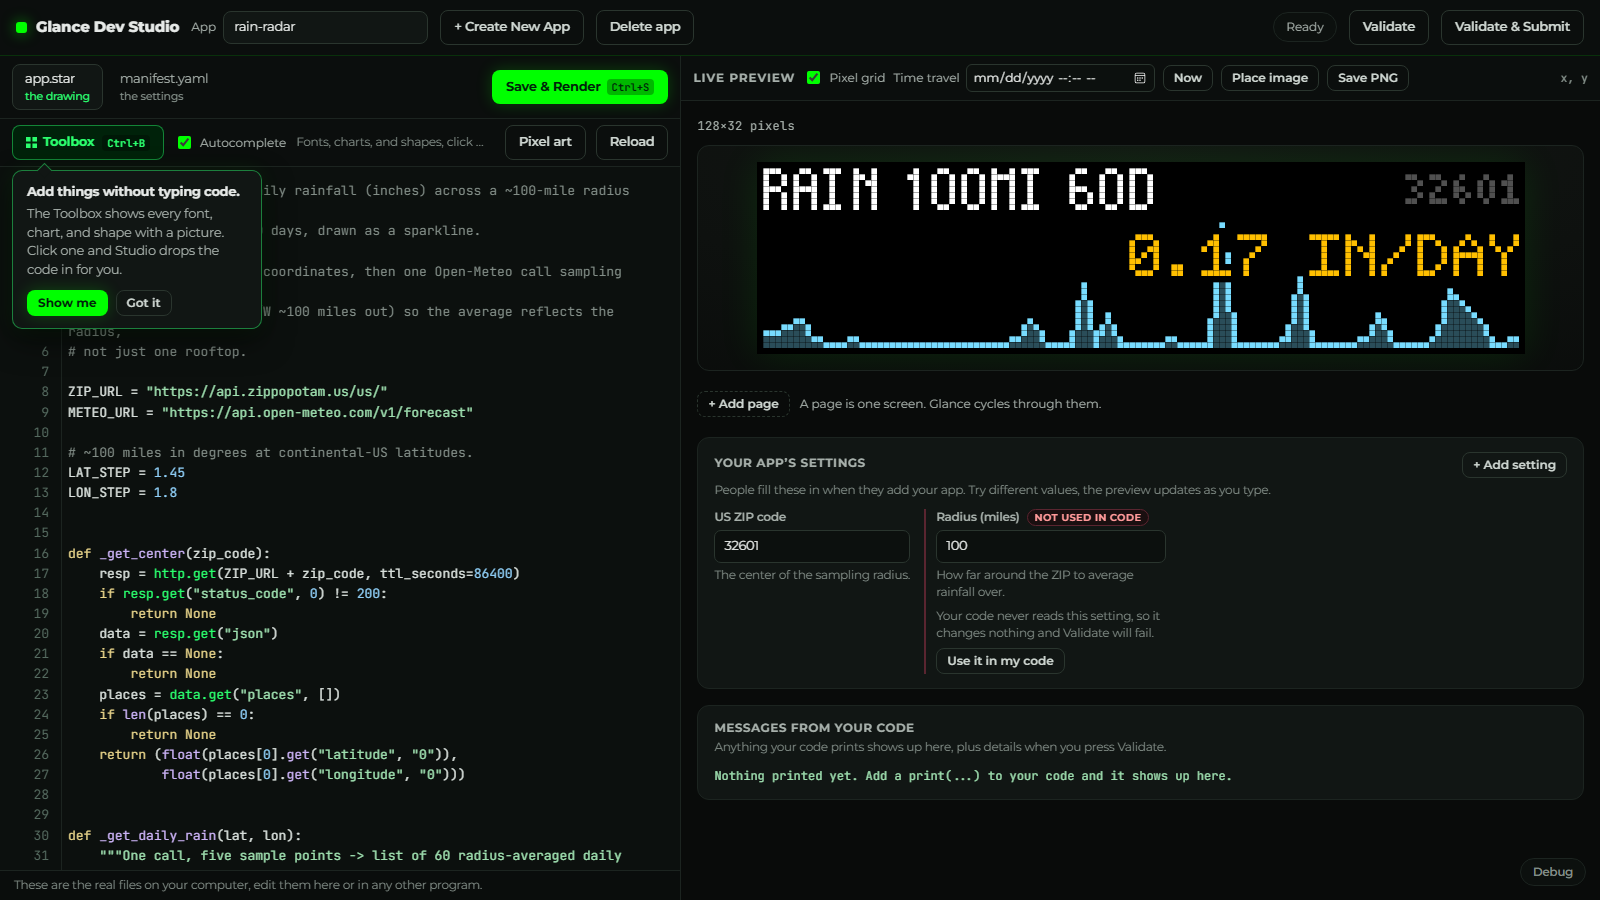
Studio even referees the conversation. Mid-session — after the radius setting existed in the manifest but before the code read it — Studio flagged it in real time:
Publishing
Nothing new to learn: the AI has already run validate_app (the same check
publishing runs) and write_previews (the same files Studio generates on
submit). From there it's the normal flow — Validate & Submit in Studio,
or:
gdn submit apps/rain-radar
and your app opens as a pull request. See Submit your app.