Example: the top 5 movies in theaters
This is a full, real build, the way it actually goes: you start with a rough idea, the AI gets something on screen, and then you reprompt it and hand-edit it, over and over, until it looks right. We'll build a Now Playing panel from the TMDB API (The Movie Database) and watch it grow from a plain text list into a poster card with star ratings and per-movie colors.
First, the ingredients
An API key. TMDB is free: make an account at themoviedb.org, then go to Settings and open API to copy your key. The endpoint we'll use returns the movies in theaters right now:
https://api.themoviedb.org/3/movie/now_playing?api_key=YOUR_TMDB_API_KEY®ion=US
Each result includes the fields we'll draw: title, vote_average (the rating),
poster_path (the image), and popularity (for ranking).
Never paste your real key into app.star. Declare it as an input with
app_input_type: api-key instead — that setting is what makes GDN store the key
encrypted (a key declared as free text is not encrypted and may not work). Name
the input without underscores or hyphens — tmdbkey, not tmdb_key; validation
rejects api-key keys containing _ or -. In the Glance app the user enters
their own key and your code reads it as ctx.inputs["tmdbkey"]. In this doc it's
always shown as YOUR_TMDB_API_KEY.
Now hand the AI the AI prompt and start.
Iteration 1: just get the titles on screen
Build a GDN app for a 128x32 panel that lists the top 5 movies now playing from the
TMDB now_playing API. One line each: rank number, then the title.

It works, and it's dull, which is fine for a first pass. The AI fetches the data and prints five uppercase rows. Now we make it look like something.
Iteration 2: one card per movie, with the poster
Nice start. Instead of a list, make it a five-page app: one page per movie, movie_1
through movie_5. On each page show the poster on the left and the title on the right.
The posters live in the app folder as poster1.png ... poster5.png, already 21x32.

Now it has a face. This is the images lesson in action: the poster is a bundled PNG, sized to the panel's 32px height and placed at the left edge. (A live panel can't fetch a remote poster per render, so the poster pack is a snapshot you refresh now and then; the text stays live.)
The first pass looked muddy, though: a full movie poster shrunk this small washes out. You don't need to know any photo-editing terms to fix that; just describe the problem in plain words and let the AI handle the technical side:
The posters look muddy and washed out at this tiny size. Fix them so they look punchy and
clear on the panel: crop them to fit, keep the colors vivid, boost the contrast, and
sharpen them a little. Save each one at 21x32.
Behind the scenes the AI picks a good shrink method and boosts the color, contrast, and sharpness, the details you'd never think to ask for by name. That's the value of describing what you want instead of how to do it.
Rotating one movie per page makes Now Playing a five-page app. In the manifest, the
pages list names one function per page, in order, and the panel cycles through them:
# One page per movie. The panel rotates through all five in order.
# Page 1 draws movie_1 (the #1 film), page 2 draws movie_2, and so on to movie_5.
pages: [movie_1, movie_2, movie_3, movie_4, movie_5]
Each name maps to a function of the same name in app.star (def movie_1(c, ctx): …),
so page 1 maps to movie_1, page 2 to movie_2, right through the top five.
Iteration 3: colors from the data, stars and a score
Add the rating under the title: draw vote_average / 2 as gold stars out of five, and
show the number too, colored green if it's 7 or higher, amber if 6 or higher, red below.
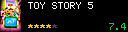
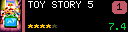
This is the "colors from the API" idea: the numbers in the response decide what's drawn. A great film lights up green; a stinker turns red, automatically.
Iteration 4: each movie's own color, and a rank badge
Two more touches. Sample the dominant color from each poster and use it as a thin accent
stripe beside the poster and as the fill of a small rank badge in the top-right. Then
wire it to the live API with my key input so it updates on its own.
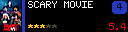
Every movie now carries its own color, pulled straight from its artwork, plus a ranking badge. Here's the live-data part the AI wrote, the reason we needed a key:
def _movies(ctx):
    key = ctx.inputs.get("tmdbkey", "")
    if key == "":
        return SAMPLE                      # offline fallback
    resp = http.get(
        "https://api.themoviedb.org/3/movie/now_playing",
        params = {"api_key": key, "region": ctx.inputs.get("region", "US")},
        ttl_seconds = 3600,
    )
    if resp["status_code"] != 200 or resp["json"] == None:
        return SAMPLE                      # API down? show the snapshot
    return [_row(m) for m in resp["json"]["results"][:5]]
Notice the two guards: no key falls back to a bundled sample, and a failed request does
too, so the panel is never blank. The key is read from ctx.inputs, never
hardcoded.
Don't be afraid to edit it yourself
The AI is a starting point, not the finish line. To get exactly what you want, open the code and change it yourself:
- In Glance Dev Studio, edit
app.star, hit Save & Render, and watch the panel update. Nudge a coordinate, swap a color, try a bigger font. - Or open the file in a code editor like VS Code and tweak it there.
Half the moves in this build were one-liners you'd just as easily do by hand: change
24 to 23 to raise the stars a pixel, swap "amber" for a hex color, bump the title to
a bigger font. You don't need the AI's permission, and every small edit teaches you the
API.
The loop is prompt, edit, reprompt, edit. Ask the AI for a change, hand-fix the thing it got slightly wrong, then ask for the next one. That back-and-forth is the work, and it's how every panel above went from plain to polished.
What this example taught
| Step | The move | The takeaway |
|---|---|---|
| 1 | List the titles | Get something on screen first. |
| 2 | Add posters | Bundle images and size them to 32px. |
| 3 | Stars + colored score | Let the data choose the colors. |
| 4 | Poster accent + live fetch | Guard every http.get; keep the key in an input. |
Keep going with more app ideas on the Examples & lessons page, or when yours is ready, submit it.