Quick start
You'll go from nothing to a working app on your screen in about five minutes. Every Glance app follows the same path:

1. Get the code & install
Glance apps live in one repository, your apps are folders inside it, and publishing is a pull request. You need Python 3.9+ and Git (or download the ZIP from GitHub).
- Windows
- macOS
- Linux
git clone https://github.com/glance-led-dev/glance-dev-network.git
cd glance-dev-network
pip install -e .
gdn version        # prints gdn 0.1.0
macOS's Python is usually Homebrew's, and it won't let you install into it —
pip3 install -e . stops with error: externally-managed-environment. Make a virtual
environment instead (the tidy way to do it anyway):
git clone https://github.com/glance-led-dev/glance-dev-network.git
cd glance-dev-network
python3 -m venv .venv
source .venv/bin/activate      # do this in EVERY new terminal
pip install -e .
gdn version                    # prints gdn 0.1.0
The .venv only applies to the terminal you activate it in. Each time you open a new
terminal to run gdn (for example gdn studio), cd back into the folder and run
source .venv/bin/activate first. Full macOS setup is in the
Install guide.
git clone https://github.com/glance-led-dev/glance-dev-network.git
cd glance-dev-network
pip install -e .   # or pip3; use a venv if your distro blocks system installs
gdn version        # prints gdn 0.1.0
Clone the main repo above and you're ready to build. When you publish, Glance Dev Studio creates your own fork and opens the pull request from it automatically, so there's no extra git setup. See Submit your app.
gdn version prints a version, you're ready. If Python isn't installed or something isn't working, the Install guide covers every step, including the "I have nothing installed" path.2. Open Glance Dev Studio
Glance Dev Studio is where you'll build. It's a small app that opens in your browser and puts your code, a live preview of the sign, your inputs, and validation all in one place. There are two ways to open it, use whichever you prefer.
Option 1: type one command. From the project folder, run:
gdn studio
Option 2: double-click a launcher, no terminal needed. In the project folder, double-click the file that matches your computer:
- Windows:
studio.bat - macOS:
studio.command - Linux:
studio.sh
Either way, your browser opens to the editor with a live preview, and a menu to pick any app.
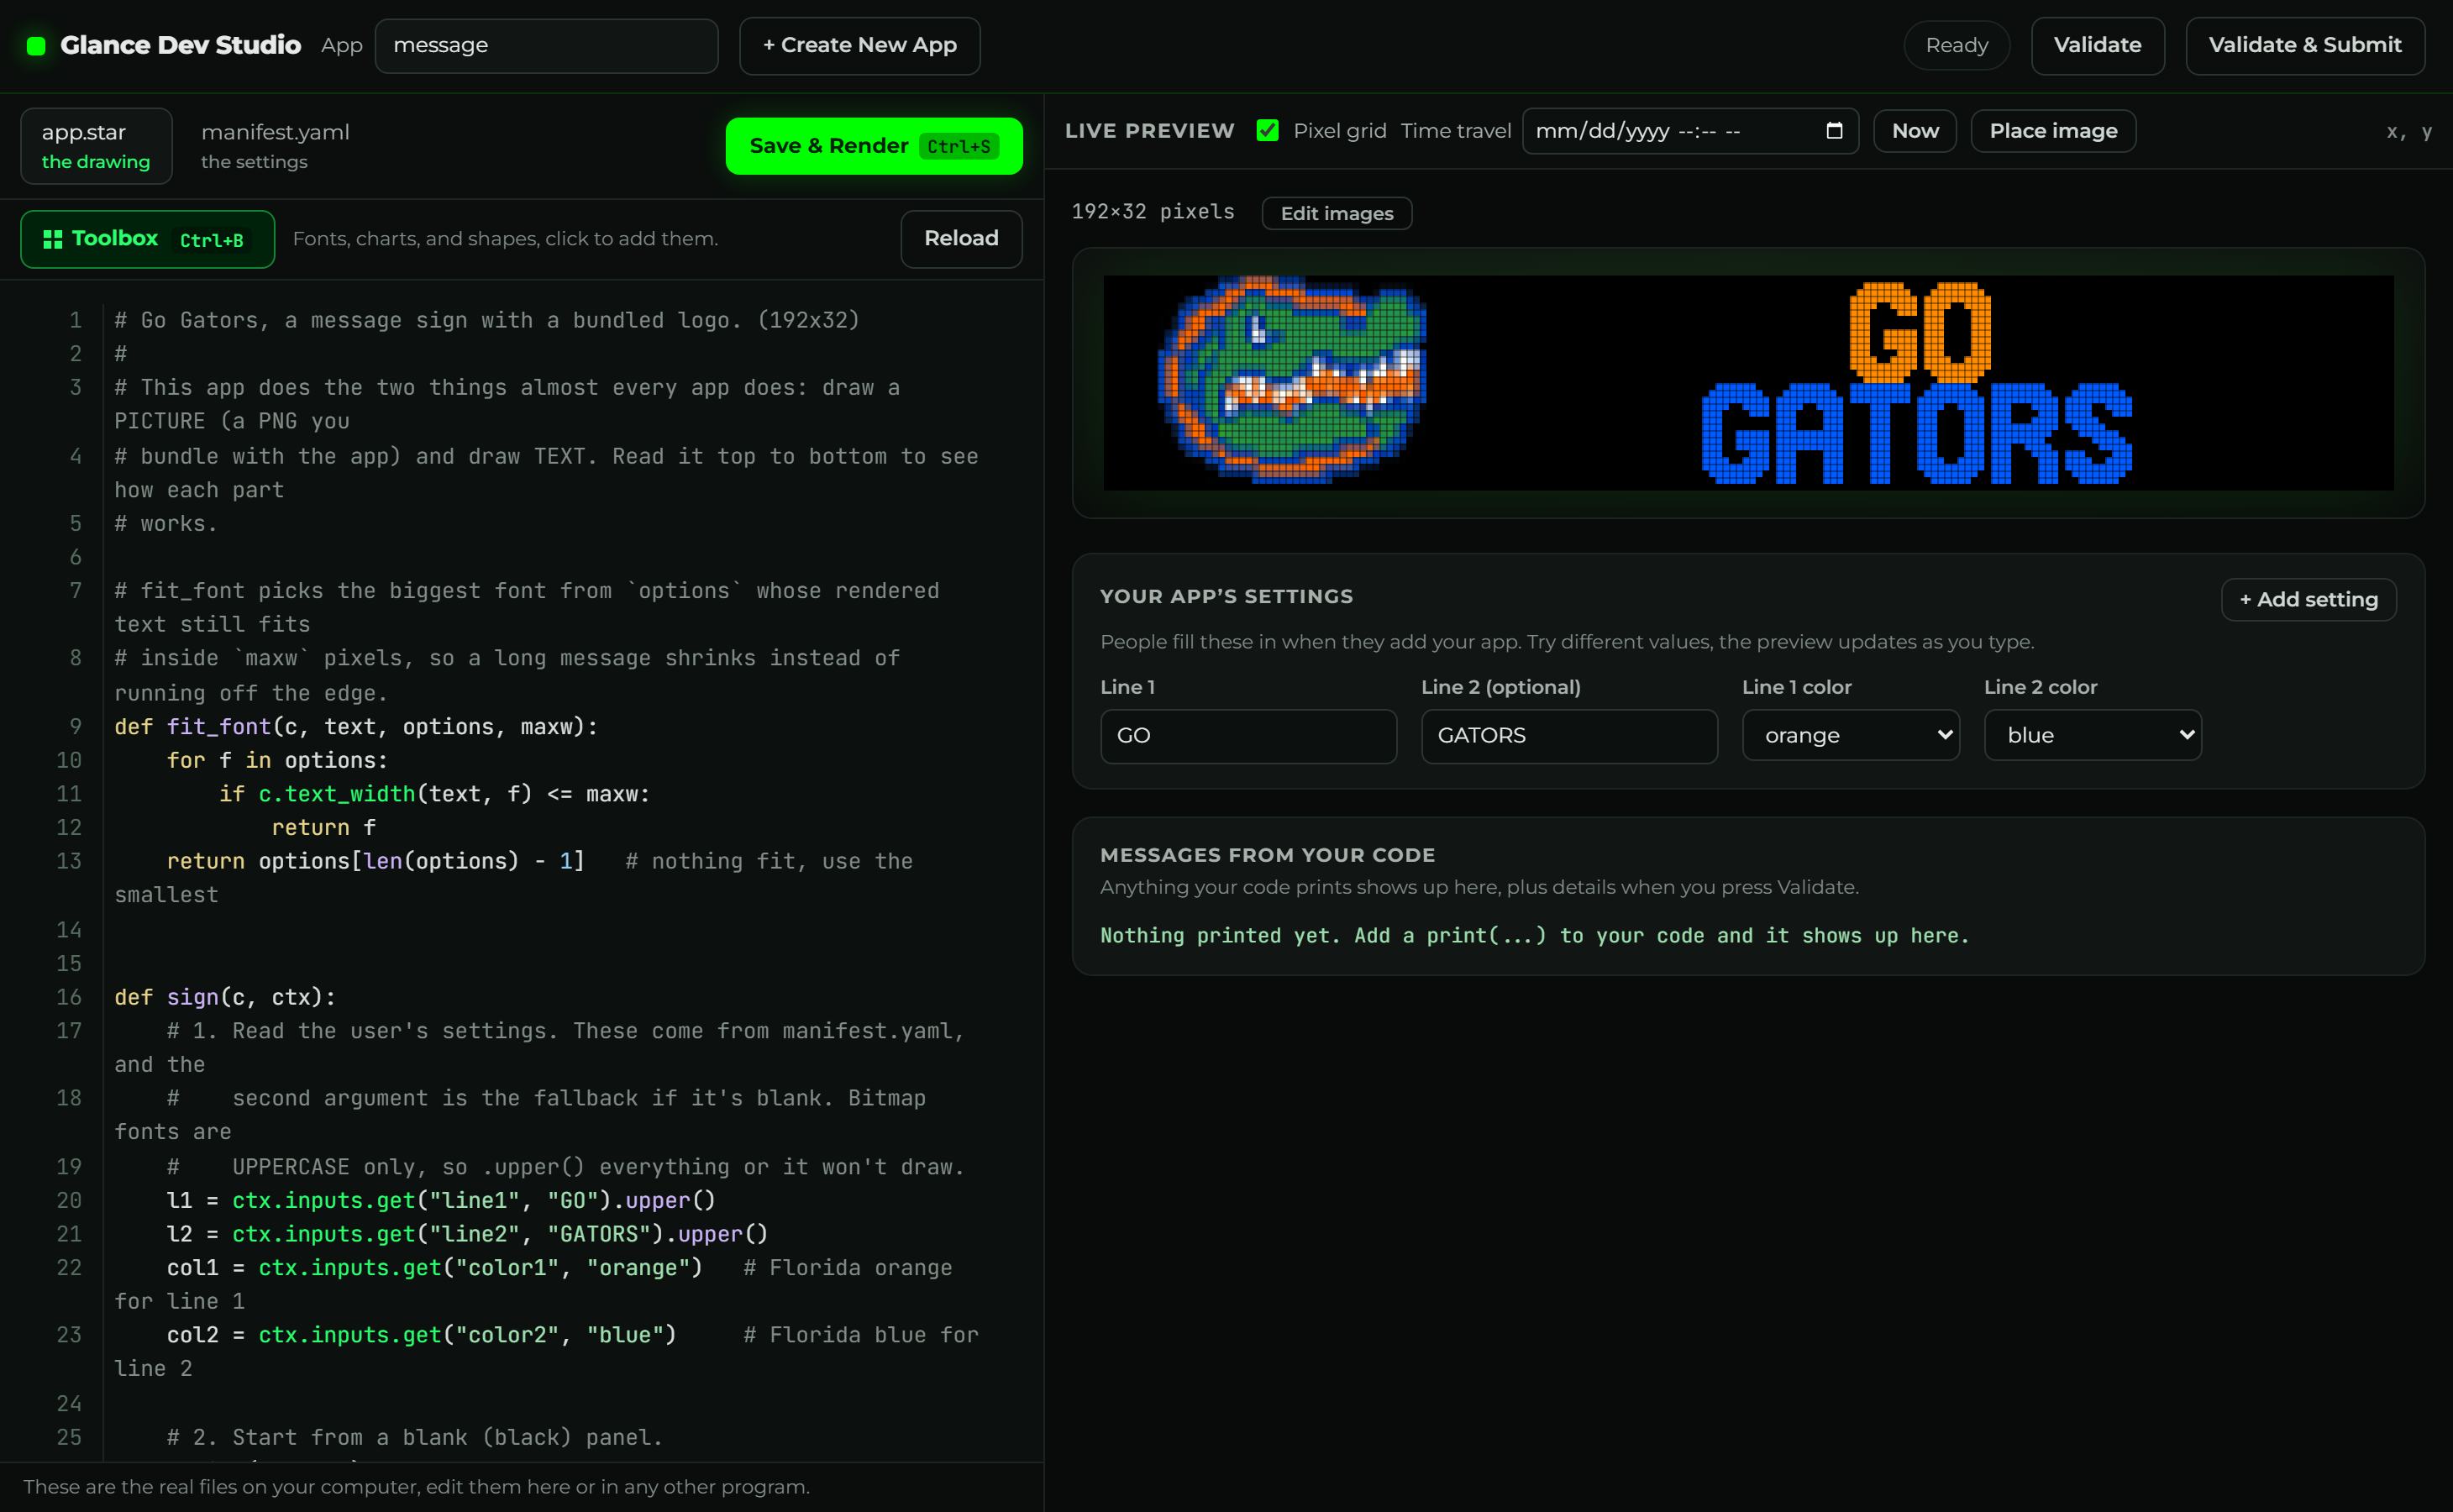
You don't have to use Studio, any code editor works, and there are matching
CLI commands (gdn preview, gdn validate, gdn build) if you
prefer the terminal. But Studio keeps the whole loop in one spot, so it's the easiest
place to start. Full tour: Glance Dev Studio.
To start your own app, click + Create New App in Studio (it makes the folder for you), or scaffold one from the terminal:
gdn new apps/my-app
Either way you get a complete, working example to change, never a blank page.
You don't have to write the code yourself. Describe your app in plain English and an AI assistant will write both files for you, which is the recommended path for most people. See Build with AI.
Whichever way you go, every app is a folder with just two files:
apps/my-app/
├── manifest.yaml   # the settings: name, size, pages, and the inputs people fill in
└── app.star        # the code that draws the picture
3. The two files, explained
Replace both files with the smallest possible app to see what each one does.
manifest.yaml is the settings. Nothing in here draws anything, it just describes
your app: its name, how big the sign is, how often it refreshes, and which pages to show.
gdn: 1
id: my-first-app     # a folder-safe id (lowercase, hyphens)
name: My First App   # the name people see
width: 128           # how wide the sign is, in pixels
height: 32           # how tall it is, in pixels (always 32)
refresh: 3600        # how often it re-draws, in seconds (3600 = once an hour)
pages: [main]        # the screens to show; each name is a function in app.star
app.star is the picture. Each page from the manifest is a function here that draws
one screen. c is your canvas, you call c.something(...) to draw on it:
def main(c, ctx):
    c.clear()   # start with a blank (black) screen

    # text_center draws text centered left-to-right.
    # The 4 is the y position, how far down from the top, in pixels.
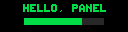
    c.text_center("HELLO, PANEL", 4, font="6x8", color="green")

    # progress_bar(x, y, width, height, percent). Every number is in pixels
    # except the last, which is a percentage:
    #   24 = x (left edge)   18 = y (top edge)
    #   80 = width           7  = height
    #   72 = percent full (0-100)
    c.progress_bar(24, 18, 80, 7, 72, color="green")
Save, and the preview shows exactly this:
Two things to know:
- Text is UPPERCASE only. The bitmap fonts have capital letters only; lowercase is
skipped, so always write in caps (or add
.upper()to your text). text_centerandprogress_barare helpers: one-call shortcuts. The full set of what you can draw is the drawing API.
Try it: change 72 to 30, save, and watch the bar shrink.
4. Explore what you can draw
Text in 37 fonts, rectangles, lines, circles, PNG images, pixel-art bitmaps, sparklines, badges… This whole dashboard is seven lines of code:

5. Validate & publish
When it looks right, check it renders cleanly, then share it. Click Validate in Studio, or from the terminal:
gdn validate apps/my-first-app
Publishing is a pull request, your app folder is the whole submission. See Publish an app.